
Troubleshooting Weed Eater That Won’t Start

No matter what you call it – weed eater, weed whacker, string trimmer – chances are at some point it won’t start. Few things are more annoying than destroying your shoulder trying to start the weed eater when there’s work to do.
Fortunately, gasoline weed-eater engines are pretty simple, so most DIYers with a few tools and some basic know-how can get a stubborn trimmer running.
Here are our guidelines for troubleshooting a weed eater that won’t start
1) Check the gasoline
Gasoline can break down in as little as 30 days, especially today’s ethanol-containing gas. Homeowners sometimes stash their string trimmer in the garage at season’s end without stabilizing the gas. Oxygen has all winter to break down and ruin the gasoline, leaving you with a trimmer that won’t start in the spring.
If your trimmer falls into this category, empty the old gas from the fuel tank and replace it with fresh fuel.
2) Clean the carburetor
Once gas breaks down, varnish, gums and other debris can form inside the carburetor and clog the tiny fuel passages. This prevents fuel from reaching the combustion chamber and igniting.
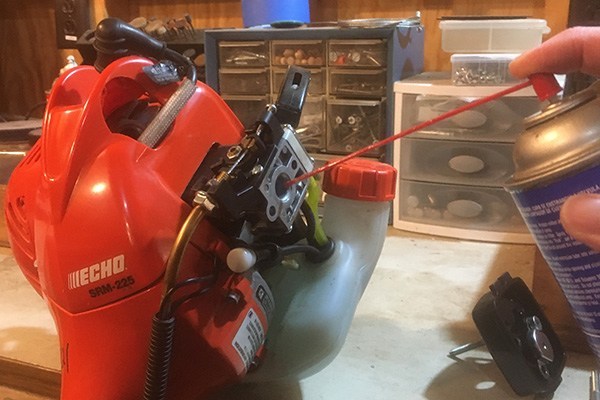
Remove the air filter and spray carburetor cleaner into the intake. Let it sit for several minutes to help loosen and dissolve varnish. Replace the filter and try starting the trimmer.
If this doesn’t solve the problem, consider disassembling the carburetor to give it a more thorough cleaning.
Beware, however – taking apart a carburetor marks a point-of-no-return, of sorts. Understanding how the delicate gaskets, tiny screws and needle valves go back together can be a challenge, even on a relatively simple string-trimmer carburetor. Take pictures with your phone throughout the process to help reassembly. Clean all the openings and passages with carburetor cleaner.
If you’re reluctant to take apart the carb, visit the servicing dealer.
3) Clean or replace the spark plug
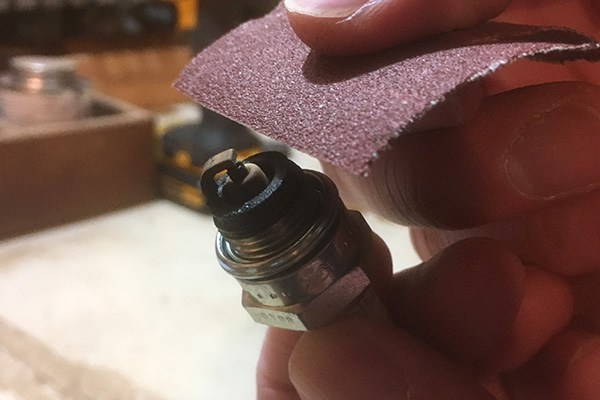
Oil deposits and carbon can foul the spark plug in a two-stroke engine if a low-quality oil is used. Deposits on the electrode prevent the plug from firing properly, which can reduce performance or prevent the engine from running altogether.
Plugs are inexpensive, so replace it if it’s fouled. If you don’t have a new plug available, clean the deposits from the electrode with light-duty sandpaper and check the gap. Consult the owner’s manual for the correct gap size.
If you know the spark plug is good, but the engine still doesn’t produce spark, the coil is likely to blame and requires replacement.

4) Clean or replace the air filter
A clogged air filter prevents the engine from receiving sufficient air to operate properly.
Before removing the air filter, brush away loose debris from around the filter cover and filter element. Tap rigid filters on a tabletop or the palm of your hand to dislodge any dirt or debris. Compressed air also works well. Make sure you direct air through the filter from the inside to avoid lodging debris deeper in the filter.
Avoid washing paper filters as this can collapse their micro-fine structure. Foam filters, however, can easily be washed using mild detergent and warm water.
As with the spark plug, however, replacement is often the best practice, especially if the filter is excessively dirty.
5) Clean the spark-arrestor screen
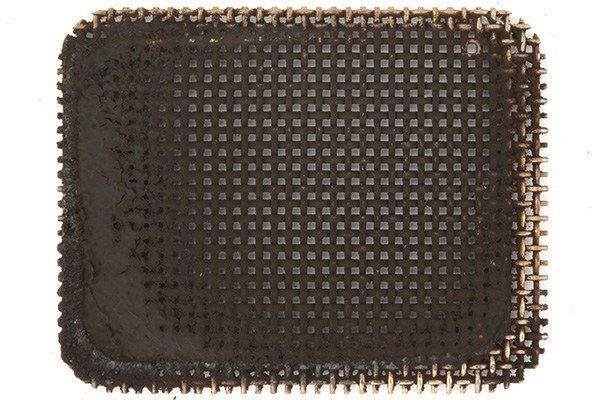
On many trimmers, a small screen covers the exhaust outlet and prevents sparks from exiting the muffler and potentially starting a fire.
As with plug fouling, too much oil in the gasoline, inferior oil and continued low-rpm operation can plug the screen with carbon deposits. This prevents exhaust-gas flow, which leads to power loss. In extreme cases, heavy deposits choke airflow enough to leave you with a weed eater that won’t start.
To fix the problem, remove the spark arrestor screen and spray it with a heavy-duty cleaner, like AMSOIL Power Foam®, to soften the deposits before cleaning the screen with an abrasive pad. Reinstall the screen and test the trimmer.
Replace the screen altogether if it’s excessively plugged with carbon.
6) Switch to a better two-stroke oil
Low-quality oil that leads to heavy carbon is often to blame for most of the problems on this list.
Using a good two-stroke oil that burns cleanly and helps prevent carbon deposits is one of the easiest maintenance practices you can perform to ensure your trimmer starts easily, runs well and last for years.

AMSOIL SABER Professional Synthetic 2-Stroke Oil withstands high heat to fight carbon in gasoline string trimmers and other two-stroke equipment. It’s tested and proven at any mix ratio up to 100:1, offering the convenience of one mix ratio for all your equipment. Plus, it’s formulated with gasoline stabilizer to help keep fuel fresh during short-term storage.
The images here show AMSOIL SABER Professional’s superior cleanliness properties. It’s just one reason professional landscapers, like Duluth Lawn Care, only trust AMSOIL products.

View the complete test results here.
Follow the guidelines on this list to get your string trimmer back up and running…and to give your shoulder a break.